Showing posts with label Decor. Show all posts

Thursday, April 5, 2012

Rug crazy

I  think I may have a bit of an obsession with rugs. As in the kind that go on your floor, not the bad kind guys wear. It started when we discovered IKEA carried adorable and perfectly proportion rugs for as cheap as $15! We've had two of theirs now (the first one we had to get rid of because it was around when we first brought Tessie home and she had a chewing habit we had to break her of) and we've loved them both. But the flexibility of being able to change the look of our living room for just a few bucks has really spoiled us (and yes I mean us).

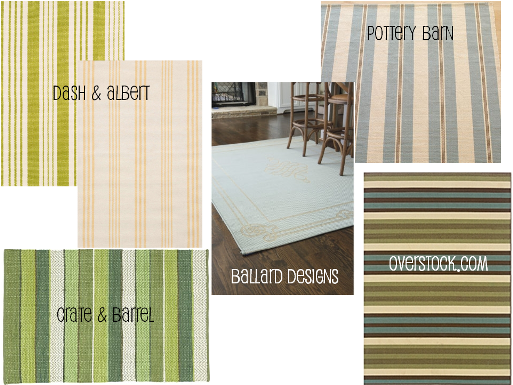
So when we brought out the brown slipcovers for the spring (we'd purchased white ones for winter and went with a grey and white rug) we knew it was time to find another floor covering. I scouted (and pinned!) a bunch of different options ranging from Overstock.com to Crate & Barrel to Dash & Albert (sadly, nothing at IKEA caught my eye this time). I picked 6 and let Jason weigh in on his opinion too. Because you know, it's his house just as much as it is mine and I want him to like the way it looks too. These were the 6 I landed on..


Their prices ranged between $50 to just over $100. We decided that we could go with something a little more expensive since we wanted it to be a rug we kept around the house for more than just the winter season (especially since spring starts in January here).

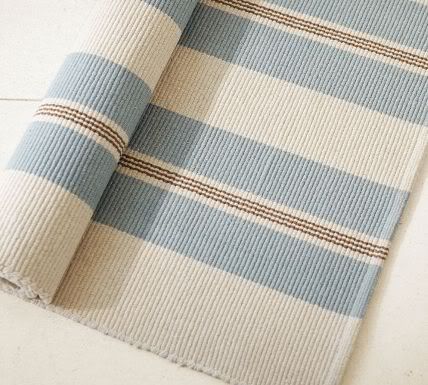
After studying the materials (we hate jute, so most of these were either cotton, wool or polypropylene), the care (we like rugs we can either shake or hose off), and how the sizes compared to the prices we opted to go with the Bistro Stripe Cotton Mat from Pottery Barn.


While technically a "mat" and not a "rug" we liked the colors, the pattern and how light it was. After some additional discussion, we also decided to go whole hog and purchase the 5x8' size. With the rug pad, shipping, tax, and all the good stuff our new addition rang up at $171.32. Eesh. That was a hard pill to swallow. So I opted to wait before buying it...

...and they sold out! D'oh!! I must have revisited Pottery Barn over and over again in the vain hope that they would restock it, and when they did they no longer carried the 5x8' size. But they did carry an 8x10' for $170! Ouch.

Finding a new rug became the bane of my existence. And then I started seeing stuff like this (HINT: this rug was DIY'd)


And that led me to Google "how to paint a rug"


And now I'm thinking...


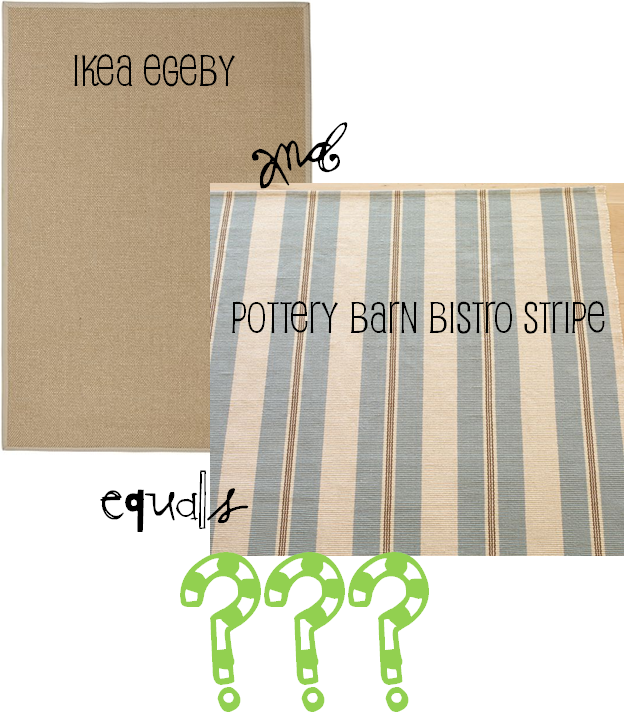
A basic rug from IKEA would make the perfect canvas to recreate the Pottery Barn rug I want. And at only $70 (for a 4x6'), the Egeby rug is exactly $100 less than its luxury counterpart. Of course I'm not taking into account my time, sweat, and tears  the technical aspect of it, but if I'm going to attempt a painted rug, I don't think I can go wrong beginning with stripes...or totally copying that chevron pattern above...

Uh-oh...famous last words?

Friday, March 30, 2012

Table luvre

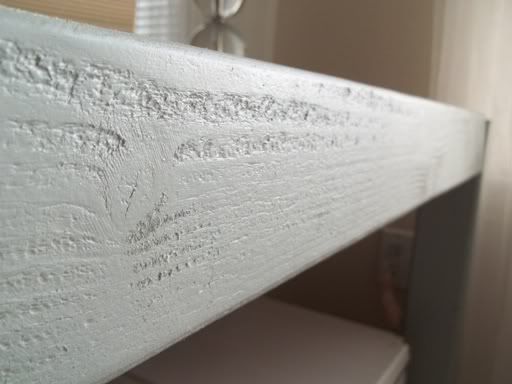
Issues I had (but cleverly hid in the original reveal photos) with this table:

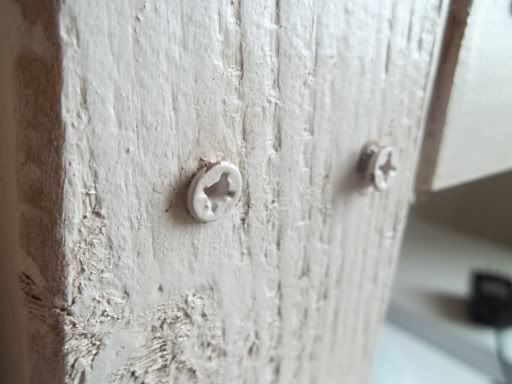
Screws that weren't counter sunk (or even level with the surface)
I didn't use the right screws to begin with, so my drill wasn't able to drive them all the way flat to the wood. Most of them stuck out quite noticeably. I used the right screws on the rebuild and it's made a huge difference in the aesthetics.


Lack of counter sinking = lack of hiding said screws
Investing in a counter sink bit set was one of the smartest things I could have done (aside from investing in a Kreg Jig, which wasn't really around when I originally built this). It enabled me to (properly) wood putty over the screws and hide them. Result? A much more "professional finish."


Paint job
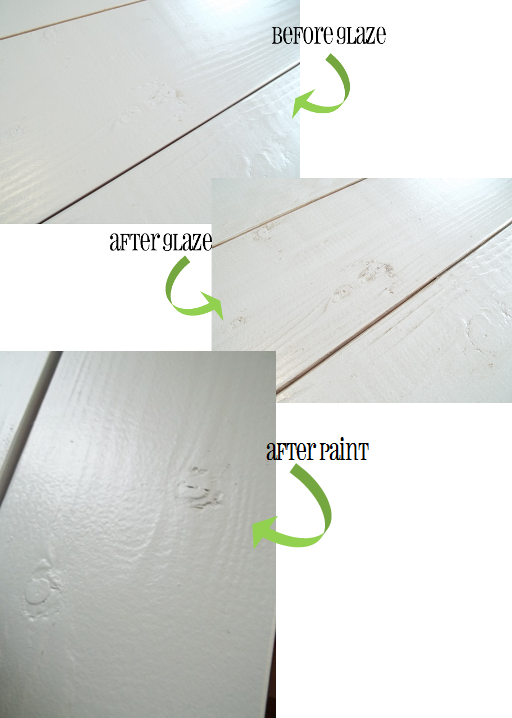
Really, the glazing. Over time my heirloom white paint + Ralph Lauren Smoke glaze = a color that was almost pink and fleshy! Ick. It was really creepy. And it also highlighted every. single. one. of my mistakes or flaws. Plus, it made the table constantly look dirty. Glaze is great, but this was not the right project for it.


Bad decision to try and hide the wood seams
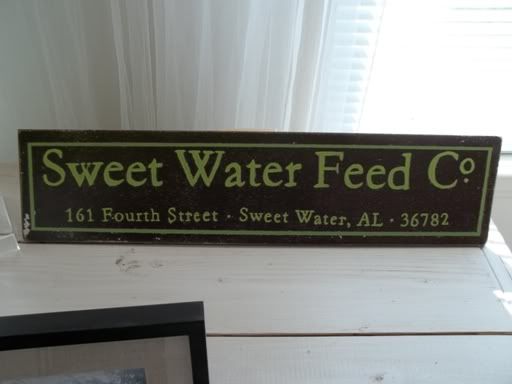
I globbed on the wood putty thinking I could sand it down to a nice smooth finish. Wrong. I ended up making a little sign to place in front of the edge that I messed up on (and put that edge against a wall) just to hide it. This was by far the most labor intensive part of the rebuild. I sanded, chipped, and even used a small handsaw to cut away the layers of wood putty that I caked on. But the ability to have a clean and clear table without having to hide such an obvious boo-boo made it worth it a hundred times over!


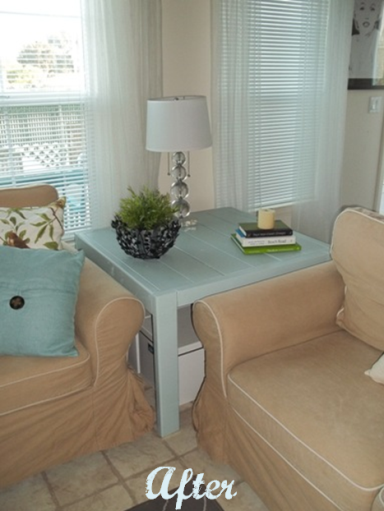
The blue adds such a fun pop of color to our living room, and it ties in with the hutch from the dinning room, and even the bookcases in the office. I have a feeling this color (along with the apple/pea shoot green) is going to become a recurring theme in our house.


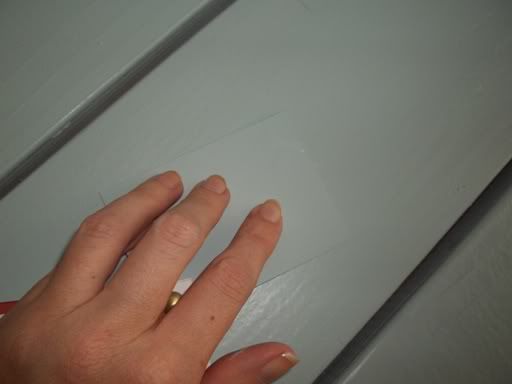
Oh, and for those of you wondering just how close Home Depot managed to color match to my Pottery Barn color swatch...


I'd say pretty damn close!

TOTAL COST: $6 for paint rollers

Saturday, March 17, 2012

Grandma's cupboard

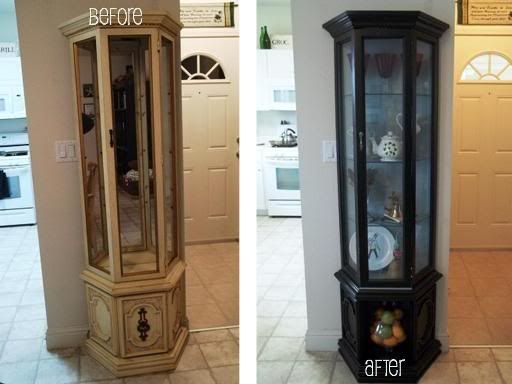
Yay! Score one for me I marked something off my list! Earlier this year (::cough::January!::cough::) my grandma gifted me with this less than desirable cabinet which she was using to house some porcelain "days of the week" dolls.


Okay, let me just make this general disclaimer: the lighting in our house S-U-C-K-S!

When they had new carpet put down in their home, they started getting rid of furniture so there would be less for them to move when the installation day came. Somewhere back in my childhood years I made the comment to my grandma that I wanted the cabinet of dolls and it was something she never forgot. I still haven't learned how to say no to my grandma (maybe that's why we've accumulated so much crap) so before I knew it, we were hauling it away--creepy dolls, bad paint job, and all!


The dolls I knew would be given away, but the longer I looked at my fugly new cabinet, the more I realized it had the potential to be the perfect sized hutch in our dinning room, whether or not I wanted to put actual dishes in it, or just start having a better place to display some of my favorite decor pieces.

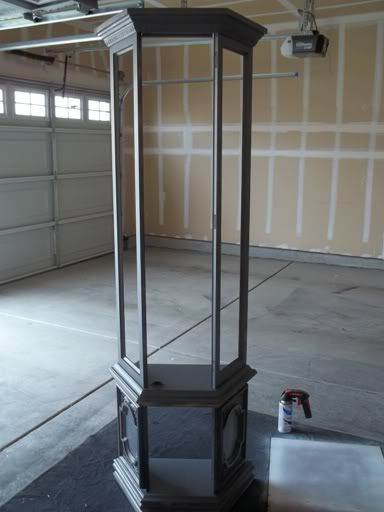
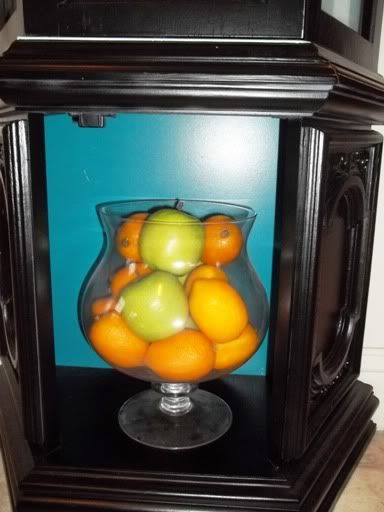
This thing had more staples, screws, hinges, and junk holding it together than I even care to rehash! The paint job was the worst I'd ever seen in my life (vanilla speckled accented in gold? genius!) and more than once I wondered if this was going to be a huge DIY disaster (would we even like it when I finished?). But once it was primed, I was feeling much better. I even opted not to put the lower cabinet door back on, and instead decided to paint the bottom of the backer board with a shot of turquoise spray paint (Rust-Oleum, Lagoon).


I had every intention of putting the mirror back on, but as we were hammering the backer board into place, the mirror fell and shattered into a billion pieces. One of which ended up in my leg (insert horrified screaming here).  I was so bummed I shelved the entire project for about 3 weeks.


Then I saw (and pinned!) this from The Lettered Cottage.


I adored the way the blue looked peeking out of the hutch! Not to mention, it made the hutch look somewhat bigger than (I think) it actually is. I was worried with the shattering of the mirror that my hutch would instantly look squat and tiny painted all black. So I headed down to Home Depot armed with the fan deck we were gifted at my first ever Pottery Barn decorating class. I had them color match "Wedgewood Gray" to their paint and primer in one formula (note: Wedgewood Gray is not currently offered in the Pottery Barn collection by Benjamin Moore). They did an amazing job! (FYI: the Pottery Barn/Benjamin Moore paint goes for about $66/gallon. I spent $13 on my quart and have barely used even a quarter of it). Once it was all painted, we used a metric ton of Gorilla Glue to reattach the backer board, followed by two days of drying.

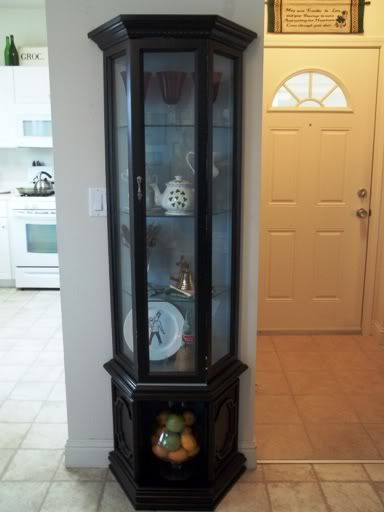
Here's the long-awaited after.


Have I mentioned the lighting in our house sucks?


Sorry for the flash but it was the only way to capture the turquoise on the back.

Top to bottom I decorated it with a few things that have been hiding in cupboards and on soffits. Top shelf: my favorite jewel red wine glasses from World Market. I bought them when Jason and I were first dating and have never found anything like them again (I actually have four, but three just looked better, and one has a tiny chip in it). I'd love to find two mercury glass votive to go in between these I think...


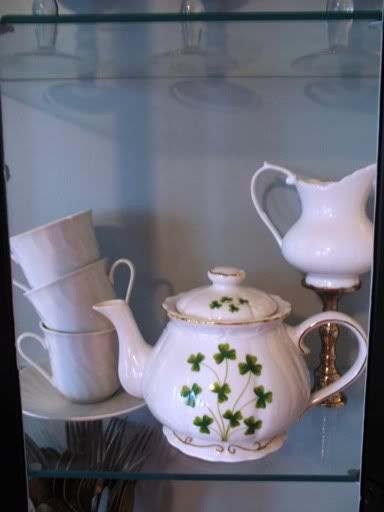
Middle shelf: my clover tea pot, purchased in Emerald Isle, North Carolina at their St. Patrick's Day Festival; little tea cups I purchased at a North Carolina flea market for a mere 10¢ each (I have a fourth one as well, but the tower was getting a little rickety...); and a small creamer pitcher I picked up at TJ Maxx sitting on top of a silver candle holder for some height. This is probably my favorite shelf (but shhhh! don't tell the others!).


Third shelf: a goblet with my family crest on it filled with vintage silverware; my little brass bell from an estate sale; two of my favorite tiny books (a book of love poems and my Irish O'merican book).


I love the way the brass bell picks up on the gold foil writing on the poetry book. 

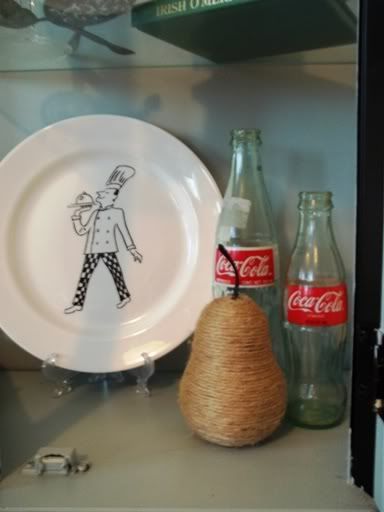
Bottom shelf--originally I had planned to stack some heirloom dishes in here that my mom has in storage, but for now this little arrangement works: a little chef plate I picked up from BB&B years ago; two "vintage" coke bottles (definitely not antique, but I love them anyways); one of my jute wrapped pears for a little texture.


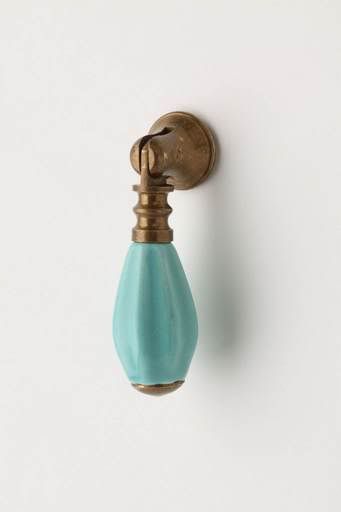
I'm extremely pleased with how it turned out, considering how it started! I may still decide to switch out the paint color of Lagoon (on the bottom part of the backer board) for an apple green later on down the road (like my favorite Martha Stewart wrapping paper). Why yes I did just link to my old blog twice in one post. I still have more work to do, mostly touch ups. I'm supper unimpressed with my 3M Blue Painter's Tape (so. much. bleeding.), I'd like to change out the hinges for an oil rubbed bronze (or maybe a silver to contrast the black), and I think I'm going to carry the Wedgewood Gray paint out onto the ledge around the display case. I'd also like to find a new drop pull for the door. Currently I'm loving this one from Anthropologie.


But for right now it's done, I can put dishes in it, and I love it!


COST BREAKDOWN:
Rust-Oleum gray primer (2 cans) - $8
Rust-Oleum Smooth Protective Enamel in satin black (2 cans) - $10
Rust-Oleum Lagoon - $0 (already owned)
Wedgewood Gray paint - $13
Rub n' Buff Silver Leaf (for drop pull) - $0 (already owned)
Decor - $0 (already owned)
TOTAL: $31

Thanks Grandma!♥

I'm linking up to:
Thrifty Thursday #52 at Thrifty Decorating

Friday, January 27, 2012

You've got mail

I don't know about you, but we have used to have a mail issue at our house.


It went everywhere--the dinning table, the book cases, the end tables, the kitchen counters. The circulars didn't get recycled, the ads didn't get torn up, and credit card offers didn't get shredded. Pain. In. The. Ass.


So I grabbed some craft baskets that were collecting dust (where else but on the book cases?) and hung them up on some hooks that were originally put up for Christmas stockings (we don't have a mantle and I'm a sucker for hooks so I wasn't in a hurry to take them down).


I debated on making tags out of remnants and chalkboard fabric, but I had a feeling that would make them look a little more country than I wanted. So instead I attached some lable holders (originally from my Kassett storage boxes from IKEA) using hot glue.


Boom. Mailboxes. Total cost? Free! Bonus: the extra hooks are great for hanging my purse or Jason's jacket when we walk through the door.

Sunday, January 22, 2012

It's not always about the UPgrades

Believe it or not we're actually thinking about downsizing our bed. This may not be any great shocker to some people (how many of us have gone from Cal Kings to Kings, or Kings to Queens?) but we're about to go down to--gulp--a full. [insert horrified screaming here] I know, it seems crazy. But hear me out.

We've wanted a new bed for sometime now, because while our mattresses-on-a-metal-frame-thing-from-WalMart isn't horrible, the bed squeaks and shakes like something from a bad motel (and I mean just doing the basics--not to get too adult here). When one of us is sick with a cough, you better believe that thing convulses right along with us. Rolling out of bed in the morning is unpleasant as well; think of an old attic door slowly being opened (BTW, our wake up times can be anywhere between 4:00 and 7:00--major sleep interruption). If Jason is having a restless night I feel every toss and turn because the whole bed sways. Have I made my point as to why we need some sort of a new bed?

As far as the whole size thing? We have an extra bed frame in storage. A real bed frame with side rails, headboard, foot board and all--it just happens to be a Full sized bed. We could have easily gone out to purchase a Queen, but it felt like a massive waste of money. Oh, and we also have mattresses for it too courtesy of my mom's old guest room. So how can we pass up a free bed just because we would lose three inches from either side and two and a half inches from the top and bottom?

So we're looking for some fresh ideas, trying to figure out how we're going to move stuff around (right now we'll probably have to rent a truck since we all drive 4-door sedans), and taking our time making sure that we don't end up keeping more junk (the upholstered headboard will probably be CraigsListed or put on our base website). In the meantime, here's one of the first photos that's caught my eye (from Pinterest).


Doesn't this make you miss summer??

Friday, January 6, 2012

De-crapifying attempt #1: hello bookworms

I hate to admit how much I love that word de-crapifying. It's so unlady-like. Come to think of it, maybe that's why I like it so much...I digress. I don't know if I've ever explained just how many books Jason and I own. Take for example this bookcase that we purchased last Christmas at IKEA.


(Ooh, ahh, so pretty and staged...)

Yeah it didn't look like that for long since it need to actually hold up its end of the job (namely, housing books). That puppy was filled up faster than I could say getridofsomedamnbooksalready! Oh, and did I mention we actually own two of those bookcase? And they're both filled overflowing? I didn't? Well they are!!

So in an attempt to start filling in some bare nooks and crannies of our house, I started thinking why not use what I clearly have plenty of? BOOKS! Rather than buying trivial (but pretty) items from places like Pottery Barn or Michaels, I started digging through the bookcases. Jason and I love our books with a ridiculous passion. We hyperventilate at the thought of letting anyone borrow one (what if it doesn't get returned?) and the thought of getting rid of anything that isn't falling apart at the spine makes us want to cry. Yeah...we have problems...we know.

Thus I give you my first meaningful vignette of the year--and the first step towards making more room in our bookcases and weeding out the junk. (Sorry in advance for the bad photos. Our landing has no windows which means purely artificial--and therefore bad!--lighting)


(Before)


(After)

Maybe others would have left this ledge alone, but I hated coming to the top of our stairs and seeing nothing. I've tried using vases, picture frames, and a lot of other little things to make it look more homey. But really it just looked cluttered. The books seem deliberate. Chunky. Filling. (Campbell's soup anyone?) Plus, I love love love my not-so-subtle tribute to our military heritage by using red white and blue books (which is a display I lost in the bookcases when I needed to fill them). Also? This little "bookend..."


...is my solution to the fact that we don't technically own bookends. (I know, WTF?) This porcelain rose was a gift from my ma (the yellow rose is the symbol of the Marine wife) and by stacking it on top of red, white, and blue books I feel like it's the perfect little display.

Books as decor =

Sunday, November 27, 2011

Face (re)lift

Dig it. The third and hopefully final rehash of my old wash basin. It's been orange (a.k.a. oak)...


It's been cottage white (a.k.a. a bad paint job up close)...


And now, it's just awesome (a.k.a. black!)


I primed everything with grey Rust-Oleum primer (using my new fave painting tool), and then repainted it with Rust-Oleum satin black spray paint. I gave it plenty of curing and drying time because I wanted this face lift to be perfect!

I'm freaking estatic with the new look. I have a feeling this is the end of my love of white furniture...

Wednesday, June 1, 2011

May 1/12, recap

So here's what got done...

The jute pears. Holy mother of jute. These suckers took forever to wrap, but I love the way they turned out. They add so much texture anywhere you put them.


The starfish and molding copy cat. So easy, so cute. So love.


My rustic sign for our kitchen soffits. Learn the story behind the Groc. & Grill in this post.


My failed attempt at the BH&G knock-off head board. Check out that pitiful and painful confession here (I re-hung our old upholstered headboard for now).


The bathroom caddy. I did it for F-R-E-E baby! Check it out here.


Along the way I was able to pare down the list as well. When it comes time to build the shelves, I'm now only going to build two sets, and I'll probably opt for something more like this (from Ana White).


The things I still want to do in the future? That canvas and burlap pillow is still calling my name. But I'm kind of overwhelmed with pillows at this point, so I'd have to find a place for it first. The DIY dresser knobs are still high on my to-do list. I want to replace the drawer handles in our master bedroom so bad! The rustic barstool would still be fun to DIY. I know I want barstools for our kitchen so I'll still be on the look out for something. And as for the wooden chargers? I may still do those...I already have a template traced, now it's just a matter of cutting and painting them and we all know how quick I am in that respect! :)


The adorable garden caddy I wanted to build, I'm choosing not to. At least not now. If we had more of an outdoor eating area I might. But we don't so for now it's going way on the back burner.


The mason jars I wanted to modge podge with blue food coloring? Well, those are now sitting in my blue bathroom caddy! So I'm thinking they'll stay clear ;)

So for all May entailed, I think I accomplished quite a few things. Now if you'll excuse me, I have to get started on my June list!

Wednesday, May 25, 2011

Big. Fat. BLEEPING. Fail.

OMG I'm not even kidding. I'm so freaking ticked off, disgusted, and spiteful right now. I hate the way the headboard turned out. Did you get that? Did the bold font make it loud and clear? H-A-T-E hate. By the time you read this, I've already take it down and am devising a plan on a.) what to do with our blank bedroom wall and b.) trying to decide what I'm going to do with the leftover wood. I'm going to show you a photo of how it turned out, just so I can show and tell you what went wrong and why I was actually on the brink of closing up shop, hanging up my hammer, and swearing off DIY projects all together. Like, seriously. Was having that kind of pity party.

To refresh your memory, this pretty little picture was my inspiration.


And here's its fugly wannabe doppelganger (notice I didn't even make the bed for this shot).


The cushions were ones I had lying around the house from IKEA. I just hot glued painted buttons into the tufted areas to make them more defined. Somehow, when I actually hung the cushions (a.k.a. nailed them on because the hook system I had originally planned on also failed) they squished together and left me with a six inch gap on the end. ????? Which is bitterly ironic, because the shelf is 6-inches too long for the bed, but that's because when I was planning on hanging the cushions from hooks, that's the size it had to be! Also, after washing drying, and vainly attempting to steam them, the cushions are still so ridiculously wrinkled! And then there are the knot holes in the pine. They would have been beautiful if I had stained the wood (which I didn't because I could finish a color I liked) but painted it just looks odd. And that brings me to the paint color itself. Not so sure how much I'm loving that yellow...although it does look nice with the lemon wreath I have hanging...

So there you have it. My big fat bleeping fail of a headboard. I'm literally cursing it and just want to rip it apart with my bare hands. But I know all that would do is ruin perfectly salvageable wood and leave me with splintered bleeding hands.

But I am not happy. And as of this posting, I have no idea what the heck I'm going to do with that blank wall which is now mocking me...

Monday, May 23, 2011

Bathroom caddy blues

This is where I'd insert some great bluesy harmonica notes if I was all techincal and stuff. But I'm not, so just imagine they're playing a good old fashioned tune in the background!

When I saw this picture I swooned (I have no idea where I found it at, but I'd love to give credit if anyone knows its origins). I fell in love with the tranquil blue chippy paint, the creamy whites, and the little touch of beach it inspired. I knew I wanted something similar for our master bath because it can get very wild and unorganized in there very quick.


I ended up using something I already had on hand--it was acting as our caddy in the living room.

This tray originally came from JoAnn's and was "white washed" to make it look beachy. I didn't like it so I used some Minwax dark walnut stain on it to give it a richer tone and added some L brackets to the corners (which I rusted using a rusting kit).


I took some leftover paints I had (a flat white and a semi-gloss turquoise) and started mixing. Once I got to the color I wanted, I brushed it on with a foam craft brush, let it dry, and used a fine grit sand paper to bring out the "wood" grain and color underneath. I'm so pleased with how it turned out!


I still want to buy some chocolate colored wash cloths and maybe some nautical soaps to fill up the front portion of the tray. And I'd like to find one large fat white daisy to go in my milk glass vase...


But for $0 I'm very happy with this little organizational project!

Oh, and as for the living room...


We picked up an old soda crate from Pottery Barn back in April to use on it! I'm loving how old and rustic it looks on our crisp white coffee table and the little punch of red the lettering gives (although I'll be the first to admit I'm a Coca-Cola girl).


It's also a lot deeper, so we can stack magazines and remotes in there as well.


And that's how we sing the blues...
Related Posts Plugin for WordPress, Blogger...