Thursday, April 5, 2012

Rug crazy

I  think I may have a bit of an obsession with rugs. As in the kind that go on your floor, not the bad kind guys wear. It started when we discovered IKEA carried adorable and perfectly proportion rugs for as cheap as $15! We've had two of theirs now (the first one we had to get rid of because it was around when we first brought Tessie home and she had a chewing habit we had to break her of) and we've loved them both. But the flexibility of being able to change the look of our living room for just a few bucks has really spoiled us (and yes I mean us).

So when we brought out the brown slipcovers for the spring (we'd purchased white ones for winter and went with a grey and white rug) we knew it was time to find another floor covering. I scouted (and pinned!) a bunch of different options ranging from Overstock.com to Crate & Barrel to Dash & Albert (sadly, nothing at IKEA caught my eye this time). I picked 6 and let Jason weigh in on his opinion too. Because you know, it's his house just as much as it is mine and I want him to like the way it looks too. These were the 6 I landed on..


Their prices ranged between $50 to just over $100. We decided that we could go with something a little more expensive since we wanted it to be a rug we kept around the house for more than just the winter season (especially since spring starts in January here).

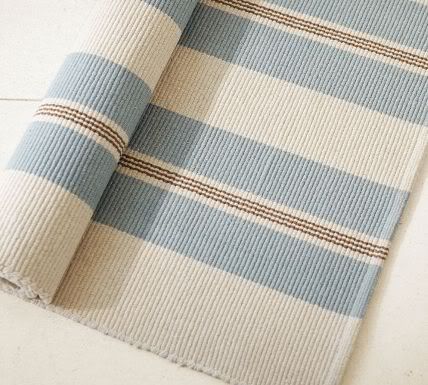
After studying the materials (we hate jute, so most of these were either cotton, wool or polypropylene), the care (we like rugs we can either shake or hose off), and how the sizes compared to the prices we opted to go with the Bistro Stripe Cotton Mat from Pottery Barn.


While technically a "mat" and not a "rug" we liked the colors, the pattern and how light it was. After some additional discussion, we also decided to go whole hog and purchase the 5x8' size. With the rug pad, shipping, tax, and all the good stuff our new addition rang up at $171.32. Eesh. That was a hard pill to swallow. So I opted to wait before buying it...

...and they sold out! D'oh!! I must have revisited Pottery Barn over and over again in the vain hope that they would restock it, and when they did they no longer carried the 5x8' size. But they did carry an 8x10' for $170! Ouch.

Finding a new rug became the bane of my existence. And then I started seeing stuff like this (HINT: this rug was DIY'd)


And that led me to Google "how to paint a rug"


And now I'm thinking...


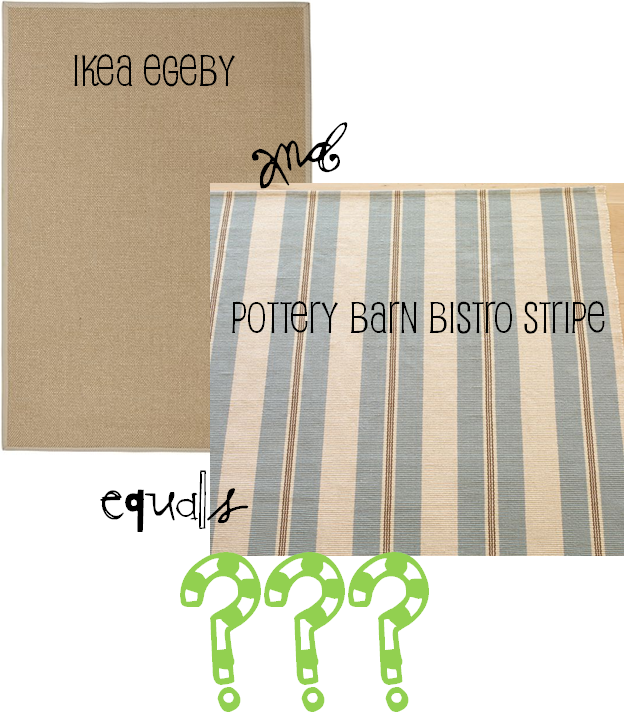
A basic rug from IKEA would make the perfect canvas to recreate the Pottery Barn rug I want. And at only $70 (for a 4x6'), the Egeby rug is exactly $100 less than its luxury counterpart. Of course I'm not taking into account my time, sweat, and tears  the technical aspect of it, but if I'm going to attempt a painted rug, I don't think I can go wrong beginning with stripes...or totally copying that chevron pattern above...

Uh-oh...famous last words?

Friday, March 30, 2012

Table luvre

Issues I had (but cleverly hid in the original reveal photos) with this table:

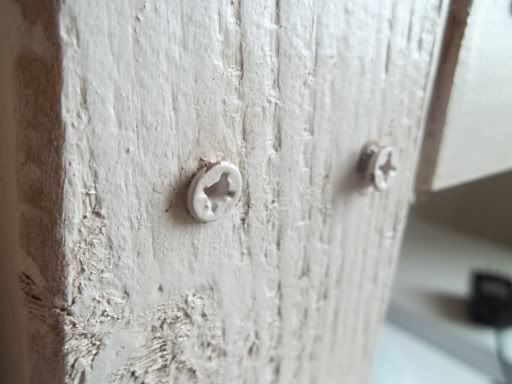
Screws that weren't counter sunk (or even level with the surface)
I didn't use the right screws to begin with, so my drill wasn't able to drive them all the way flat to the wood. Most of them stuck out quite noticeably. I used the right screws on the rebuild and it's made a huge difference in the aesthetics.


Lack of counter sinking = lack of hiding said screws
Investing in a counter sink bit set was one of the smartest things I could have done (aside from investing in a Kreg Jig, which wasn't really around when I originally built this). It enabled me to (properly) wood putty over the screws and hide them. Result? A much more "professional finish."


Paint job
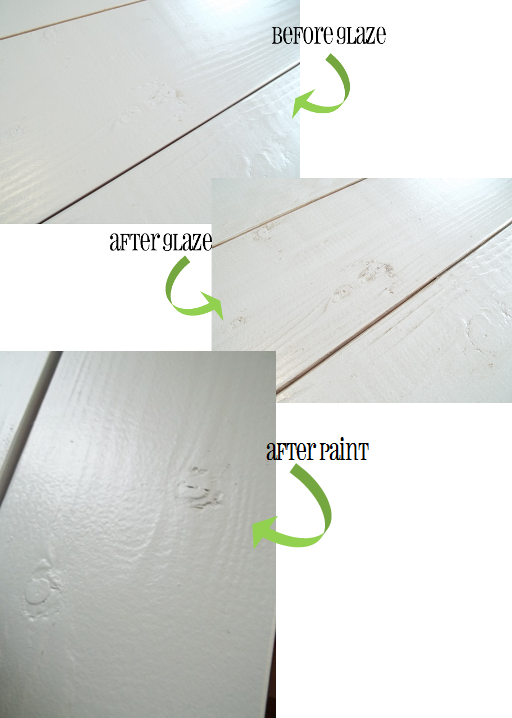
Really, the glazing. Over time my heirloom white paint + Ralph Lauren Smoke glaze = a color that was almost pink and fleshy! Ick. It was really creepy. And it also highlighted every. single. one. of my mistakes or flaws. Plus, it made the table constantly look dirty. Glaze is great, but this was not the right project for it.


Bad decision to try and hide the wood seams
I globbed on the wood putty thinking I could sand it down to a nice smooth finish. Wrong. I ended up making a little sign to place in front of the edge that I messed up on (and put that edge against a wall) just to hide it. This was by far the most labor intensive part of the rebuild. I sanded, chipped, and even used a small handsaw to cut away the layers of wood putty that I caked on. But the ability to have a clean and clear table without having to hide such an obvious boo-boo made it worth it a hundred times over!


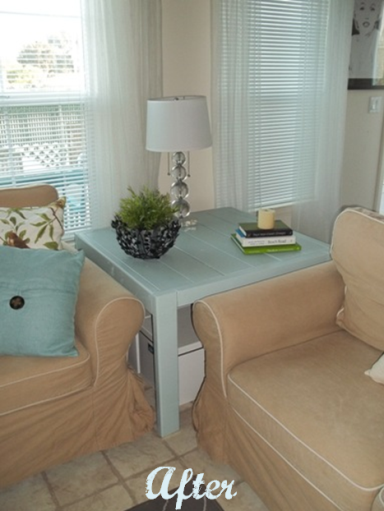
The blue adds such a fun pop of color to our living room, and it ties in with the hutch from the dinning room, and even the bookcases in the office. I have a feeling this color (along with the apple/pea shoot green) is going to become a recurring theme in our house.


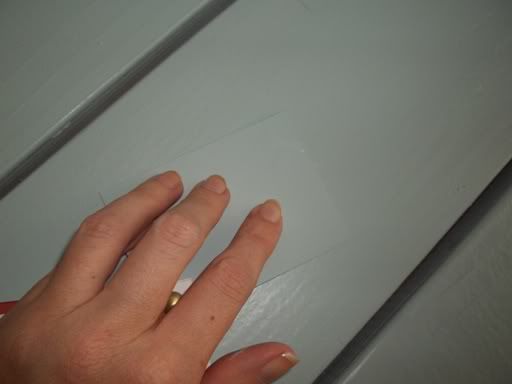
Oh, and for those of you wondering just how close Home Depot managed to color match to my Pottery Barn color swatch...


I'd say pretty damn close!

TOTAL COST: $6 for paint rollers

Sunday, March 25, 2012

One decision made...for now

I suppose one decision is better than living life with a giant question mark above your head. And even though it's only been ten days since we announced M#8, it seems like it has taken 50 years just to get here. Truthfully, I think I have been in denial. This is all just a bad dream. If I don't think about it, it will just go away. If I cover my eyes, it's not really standing right in front of me. But unfortunately, this is not a situation in which I can bury my head in the sand and pretend there's nothing going on.

The reality is, once Jason gets orders, we will have about one month to move.

That's it.

In my mind, that meant four weeks to a.) decide if I'll stay or go, b.) pack, c.) inform work if I decide to leave, d.) find a place to live if I decide to stay (that's available like now), and e.) actually move. All the while Jason would still be in recruiting school and possibly preparing for his own move. Heavy. With a capital H. And that's exactly why my mind was spinning. Either decision seemed so final. Either decision seemed so sucky. Thankfully, my mom offered us a middle ground. One that still has an opened ended outcome, but offers us a reprieve from the immediate terror stress I think Jason and I are both feeling.

Let's move now.

Let's find a place that would be affordable even if Jason moved to Small Town, America and only received $1,000 a month for housing allowance (which would be used to pay my rent here--he'll have an additional stipend from the military to help cover a room-for-rent or studio apartment for him). Let's try to make it work so that in case we are rainbows-and-four-leaf-clovers-shooting-out-of-our-arses lucky enough that he gets stationed locally, it would work for the long term as well. If he leaves, we'll have X amount of months to test the situation. If suddenly I hate my job, or if our marriage starts having problems, or if the miles apart just become unbearable, once our lease is up I can pack up and move. If things are going fine, I can stay and once his duty is up, he can move back (y'know, if the military gifts us with California orders again).

So that's where we're at now. The house hunt has officially begun. 

Wednesday, March 21, 2012

I have no clever title for this post...

Seriously, I must have sat here for a good ten minutes trying to think of something quirky but cute to say about my latest list-crossing-off attempt. Writer's block! Anyhoo...progress is the name of the game! I'm throwing myself into projects to keep my mind off of M#8 (because truthfully, I think about it all. day. long.) and I'm crossing things off of my list with a Zorro-like fever. Take that sconces! Feel my wrath hutch! And currently, my hands are covered in Wedgewood Gray paint from the end table! Woot!

And I mean WOOT.

When I first took on this newest make-over, I thought it would be as simple as busting out a roller, maybe removing the legs, and it would be done in a day. HA! Shows how much I know! This was the post I put up on Facebook after my first day of working on it.


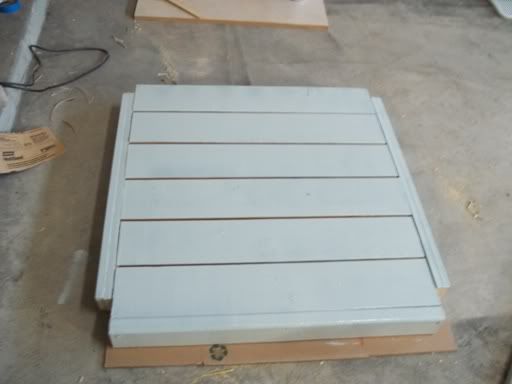
For shizz. I was D-O-N-E (and note, that was posted Sunday. It's now Wednesday. Night). I couldn't believe how anal I got about wanting to fix all of the mistakes I made on the first round of building. In all fairness, it was the first thing I've ever built from scratch, so I guess some blunders here and there are bound to happen. The biggest pains (but most rewarding results) have been removing the old caulking and wood putty, and re-drilling the holes with a counter sink bit.


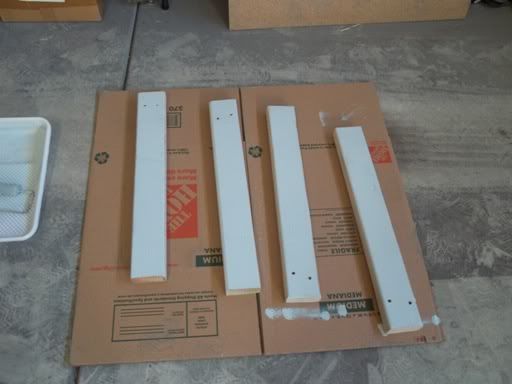
I don't own a Kreg Jig (yet) so after I originally built this piece, I realized how important it was to counter sink screws so they could be filled in properly with wood putty. Also, one of the skirt pieces had to be replaced really bad because I stripped the screw head, tried to remove it by less, um, "conventional means" (read: banging on it with a hammer), and realized salvaging it was hopeless. Luckily, I had a spare piece of matching wood and I'm able to cut a new piece. I'd like to replace the other two sides as well where I doubled up some thinner pieces (you can see them on the left and right sides of this picture), but I'm not too concerned with those at this point.


Okay, and I'm sorry with with all the screws and woods I've dropped in this post, I feel like it's mildly PG-13-ish. No? Just me being immature? Okay...moving on...

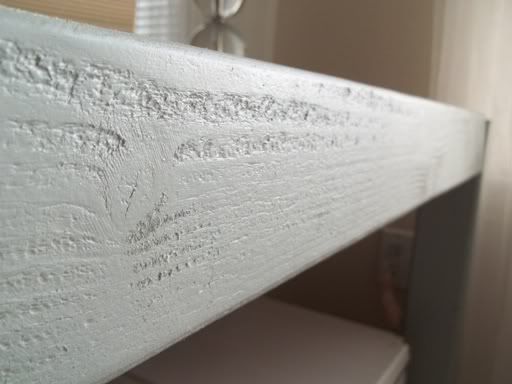
The photos above show only one coat of my Wedgewood Gray paint, and I've already added a second. I'm slowly becoming obsessed with this color! I still have to paint in between the planks, but I'm debating on whether or not I'll try to fill in seams this time around. Now that everything has been sanded and repainted it doesn't look as bad with the seams unfinished.

I'm hoping to have it completed by this weekend (or shoot, tomorrow even!). But in non-table make over news, I do have to show you some other artwork I've been working on.


Alright, normally I hate feet shots and my little wrinkly toes are nothing to write home about. But isn't this nail art from Sephora cute?? It's my new favorite "accessory" and I've done a set on my fingers (since removed) and now this one on my toes. The manicure lasted a solid two weeks, and the only reason I removed it was because the grow out from my nails was starting to look less than classy. BONUS: I think it makes your nails stronger because I didn't have a single one break the entire time I wore them. Unheard of for me!

So that's the latest around here. Hopefully I'll have some after photos to share sooner rather than later. Sunday we're supposed to make a trip to IKEA for a few odds and ends (maybe finally get the brackets to complete my Pottery Barn knock-off shelves??) and possibly look at a bed frame for the master bedroom (since the bed is staying).

Feels good to be back up to my elbows in DIY. 
Related Posts Plugin for WordPress, Blogger...